Getting Started
Accounts and local sessions
You can use webENA in two ways:
- Signed in. Projects and sets are saved to your account and are available from any computer.
- Local session (Run Offline). Everything stays in this browser and is never sent to our servers. In Chrome and Edge you can link a local folder so your projects are also written to files on your computer; otherwise they are kept in the browser's own storage.
In a local session, your work lives only on this computer. Use Backup on the Sets panel to export a project as a zip file, and Import to bring it back. Clearing your browser data without a linked folder or a backup removes your projects. Firefox can't link a folder, so export regularly there.
Working offline and installing the app
Once you have opened webENA in a browser while online, a local session also works without an internet connection: open the same address (or the installed app), choose Run Offline, and your projects, models and the sample set are all there. An amber You're offline notice appears at the bottom of the screen while there is no connection; everything you do is kept on this computer as usual. Offline use is for local sessions only: a signed-in account's projects are kept in the cloud and are available only with a connection, so opening the app offline while signed in shows a notice to reconnect and retry rather than your projects.
In Chrome and Edge you can also install webENA as an app: use Install in the address bar (or the browser menu). It opens in its own window and appears with your other applications; it is the same tool, with the same local sessions. The installed app updates itself the same way the website does: a Refresh to update notice appears when a new version is available. If you install it from the nightly site, expect those updates far more often, since nightly changes with every development build.
The screen
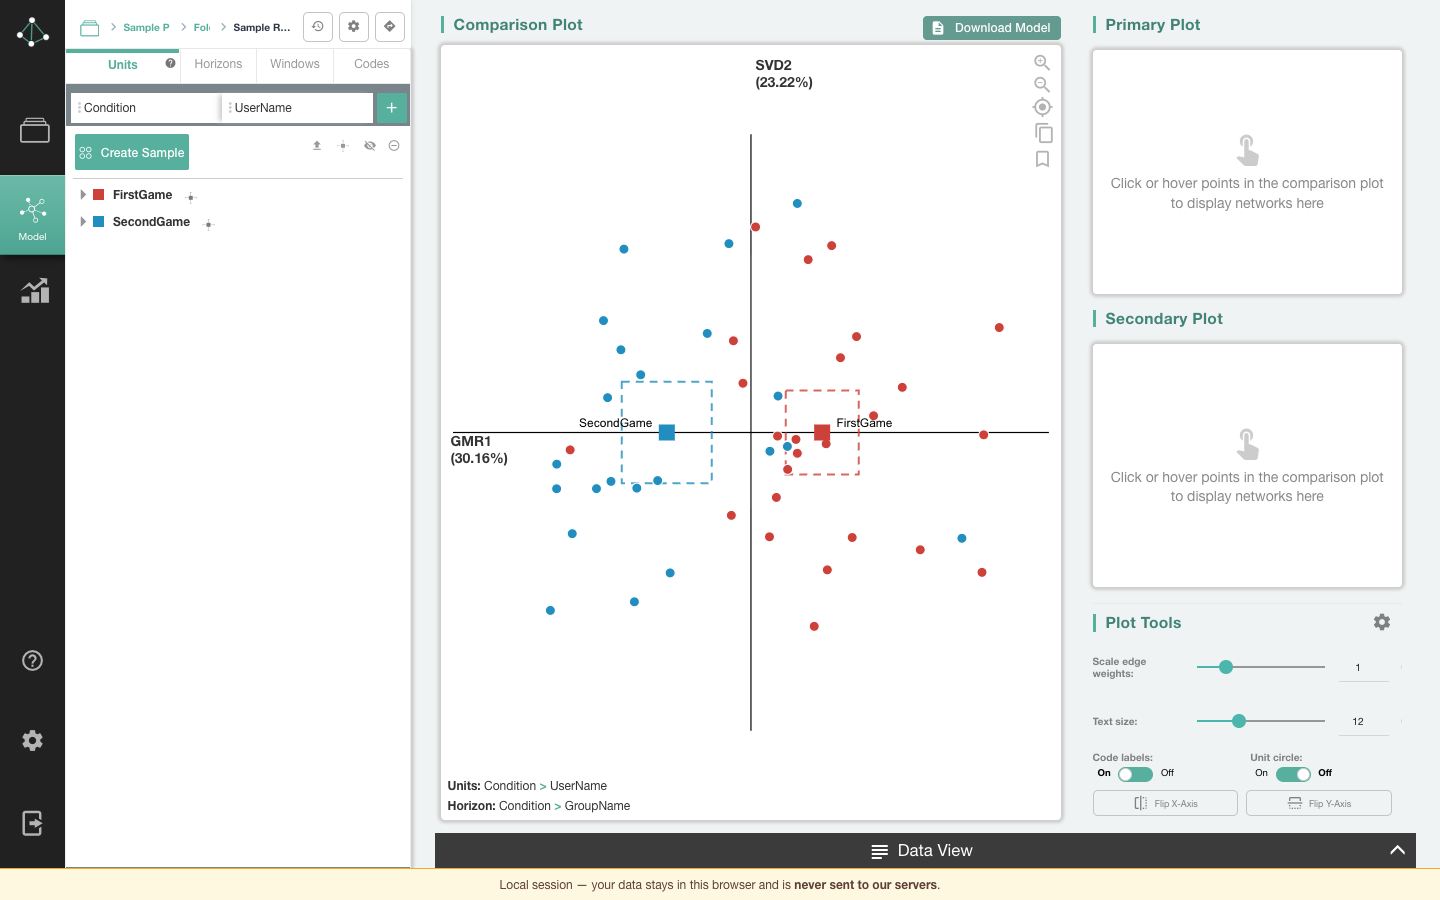
- Left rail: switch between Sets, Model, and Stats, and open Help and Settings. The version number under the logo shows what's new.
- Left panel: the active tab. When a set is open, the panel header has icons for Advanced Options (the gear), and the Tutorial.
- Graphs area: the comparison plot in the middle, the primary and secondary plots and Plot Tools on the right, and the Data View drawer along the bottom.
Your first model
- On the Sets panel, create a project, then click + to create a new set and choose your data file. See Data & Sets.
- Choose Use Plausible Parameters to let webENA suggest a starting model, or Manually Create Model to set it up yourself.
- On the Model tab, check the four parts of the model. Until the model is
complete, the plot shows a checklist of what is still needed:
- Units, with at least two units;
- a Horizon;
- at least three Codes.
- Once the model is built, hover and click points in the plot to explore their networks, and open the Stats tab to compare groups.
The tutorial
The Tutorial walks you through a simple ENA model in the app itself: choosing units, horizons, a window, and codes; reading the plot; comparing two groups; opening the lines of data behind a connection in the Data View; and testing the difference. Each step highlights the part of the screen it talks about, and some ask you to do something (add a column, click a point) before you continue. Steps your model already covers are marked done.
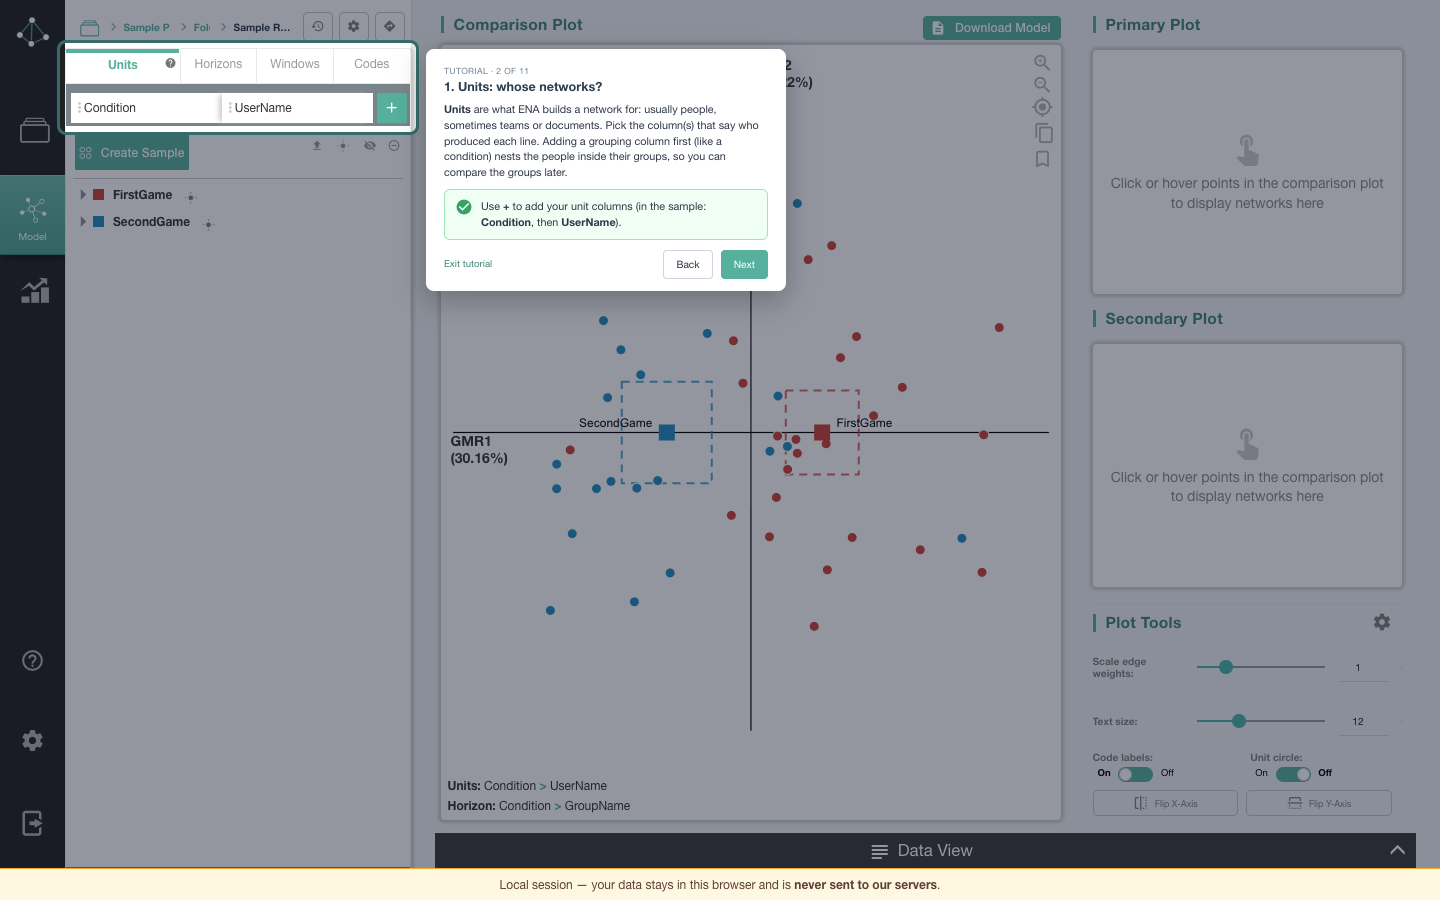
Start it from the directions icon in the model panel header: choose Guided tour. It works on any set; the Sample RS Data Set is a good first choice, and the first time you use webENA it opens that set and starts the tutorial for you. Click Exit tutorial to leave at any time.
The setup wizard
To build a model for your own data step by step, choose Use Tutorial when creating a set, or choose Setup wizard from the directions icon in the model panel to go through the open set's model. The setup wizard shows your data and walks through each part of the model: click the column headers for your Units, Horizons, and Codes, choose a Window (webENA suggests a size for your data), and optionally a column to group units by for comparison. Each step shows what your choices produce, such as the list of units. Review summarizes the model, and Finish builds it. You can change everything later on the Model tab. Cancel leaves the wizard and puts the model back as it was.
Your data
webENA expects one row per line of activity (an utterance, a post, a log event) with:
- columns that identify who produced the line (for units, such as
UserName) and where it belongs (for horizons, such asGroupNameorActivity); - one code column per concept, usually 0/1 for absent/present.
When you upload a file, webENA warns you about missing column names and columns with empty or NA values, so you can fix them before modeling.